Remerge utilizes the Kochava click-tracking link to achieve the following goals:
- Ensure the most optimal user experience.
- Notify Kochava of a Remerge click.
The following guide takes you through Android and iOS tracking link generation with Kochava. In case of any questions, reach out to your Remerge Account Manager.
1. Locate your App
- Log in to your Kochava Account and click All Apps in the upper left-hand corner of the dashboard's navigation menu.
- Find your app by typing it in the search bar.
- Scroll down, find your app, and click Campaign Manager by selecting it from the dotted drop-down menu to the right of your app name.
2. Generate your Remerge Tracking Link
- Go to the upper right-hand corner of the page and click the Add a Tracker button.
You should find yourself on the NEW TRACKER page.
- Select your CAMPAIGN and SEGMENT names from their corresponding drop-down menus. Once you have completed the tracking link creation process, you may find the newly created links under the selected names. Alternatively, you may create a new campaign and segment by clicking the Click here button and following the instructions.
- Go to the TRACKER NAME field and enter your Remerge tracking link name.
- Go to the TRACKER TYPE and select your corresponding campaign strategy (i.e., User Acquisition or Retargeting) from the drop-down menu.
- Go to the MEDIA PARTNER field and select the Remerge campaign (in our example, Remerge- iOS) option from the drop-down menu.
- Tick the SHARE WITH PUBLISHER box.
- Go to the TYPE field and select the Custom option from the drop-down menu.
- Go to the DESTINATION field and enter the URL information that redirects your user to the digital store of the platform on which your app is located (iOS - Apple App Store / Android - Google Play).
-
Retargeting Campaign - Add your DEEP LINK in its respective field.
-
Retargeting Campaign - Go to the EVENT field and enter your re-engagement event by clicking the + sign and selecting it from the drop-down menu.
- Upon completion, click the Save button at the bottom of the page.
Please note: The impression URL (required for View-Through-Attribution) and Click URL (required for Click-Through-Attribution) are automatically generated on the creation of the tracker, as per the below example.
- You may edit your tracking link by going to the dotted drop-down menu to the right of your Remerge tracking link name and clicking the Edit button.
- You may also review your previously created tracking links by going to the Campaign Manager page and reviewing said tracking links hosted within the Campaign > Segment > Tracker hierarchy.
3. Configure Lookback Windows
Kochava's lookback window configuration setup takes place on the following three levels: Default, Partner, and Tracking Link.
Default Level
- Click Partner Configuration, located in the upper left-hand corner of the dashboard.
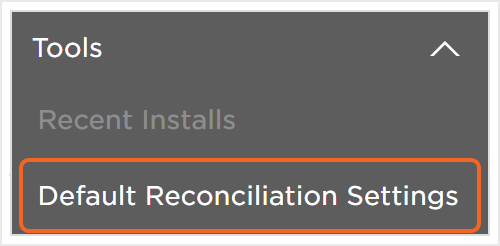
- Go to Partner Configuration drop-down menu > Default Reconciliation Settings.

Retargeting Campaign:
- Set your install reprocessing window as short as possible (i.e., 1 Day). For further information on install reprocessing, please refer to Kochava's documentation.
- Toggle the Impression Settings to ON.
User Acquisition Campaign:
- Toggle the Limit Ad Tracking Fallback setting to ON, as per Kochava's instructions.
- Screenshot your Default Reconciliation window, as you will need to forward it to your Remerge Account Manager.
Partner Level
- Click Partner Configuration.
- Locate Remerge and click the Reconciliation setting by selecting it from the dotted drop-down menu to the right of the network name.
- Screenshot your Partner Level window (as per the below example), as you will need to forward it to your Remerge Account Manager.
Tracking Link Level
- Go to your previously created Remerge tracking link and click Overrides by selecting it from the dotted drop-down menu to the right of the tracking link name.
You should find yourself on the Tracker Overrides page, which you may utilize in case you wish to employ different lookback windows. This page automatically overrides the Partner Level (default) lookback windows.
Nonetheless, for alignment with Remerge and campaign optimization, please employ the Partner Level (default) lookback windows. Accordingly:
- The Tracker Overrides page fields should be set to Default.
- EVENT ASSOCIATION LOOKBACK should be set to Unlimited.
-
Screenshot your Tracker Overrides windows, as you need to forward them to your Remerge Account Manager.
4. Share your Remerge Tracking Link & Lookback Windows with Remerge
Upon completion of the above steps and prior to going live, ensure to provide your Remerge Account Manager with the following information:
- Final Remerge Tracking Links - Click & Impression.
- A screenshot of all of your lookback windows:
-
Default Level
-
Partner Level (Reconciliation page)
-
Tracking Link Level (Tracker Overrides page)
-
Default Level